|
Creating Custom Fields |
  
|
|
Creating Custom Fields |
|
Custom fields can be created on Corporate Settings tab of Projetex Server Administrator. To create or modify custom fields:
1. Run Projetex Server Administrator.
2. On the Database tab click Go Offline button.
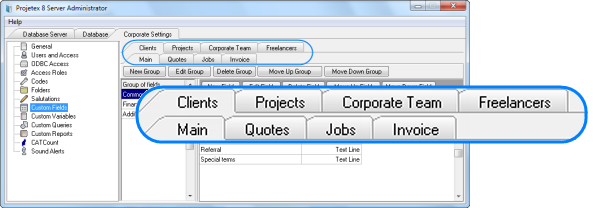
3. Click Corporate Settings tab.
4. Click Custom Fields.
5. Select the required area tab (Client, Project and so on)
6. Select a group of fields.
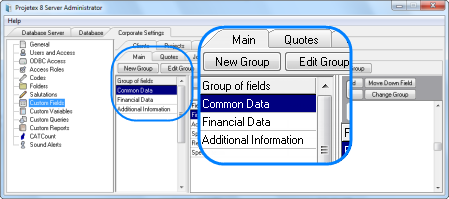
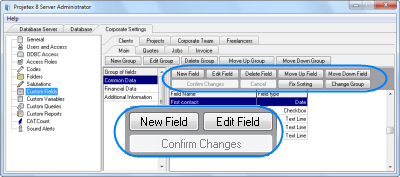
6. Click New button.
3. Fill the fields of the New Custom Field window:
| • | Enter the name of the new custom field in Name field. |
| • | Select the data type of the new custom field from Type drop-down list. |
| • | (Optional) Enter the name for this custom field; you will be able to use this variable in the .RTF templates. |
| • | Click OK button to add the specified custom field or click Cancel to discard. |
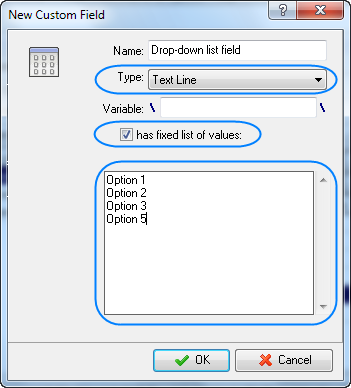
Example: To create a custom field that will look like a drop-down list, select Text line as data type, and then select Has fixed list of values check box. Enter the options for that check box in the field that appears:
|
To move the custom fields to another Group of fields, i.e. another tab, click Change Group button, point with the mouse arrow at the target Group of fields (Group of fields records become blue when you point at them), and click on it once.
To change the order of custom fields, use Move Up Field/Move Down Field buttons.
To confirm changes which you have done, click Confirm Changes button.
![]() Note: If you have not clicked this button and go out from Custom Fields settings, Projetex will ask you whether changes must be saved.
Note: If you have not clicked this button and go out from Custom Fields settings, Projetex will ask you whether changes must be saved.