
The Users and Access area can be used to browse existing user accounts, create new users and modify the access rights of existing users.
Double-click any user in the list to edit their access rights.
Click the New button to add a new user account.
Click the Edit button to edit the currently selected user account.
Click the Delete button to delete the currently selected user account.
New/Edit User Window
In this window, the access rights of a user can be configured.
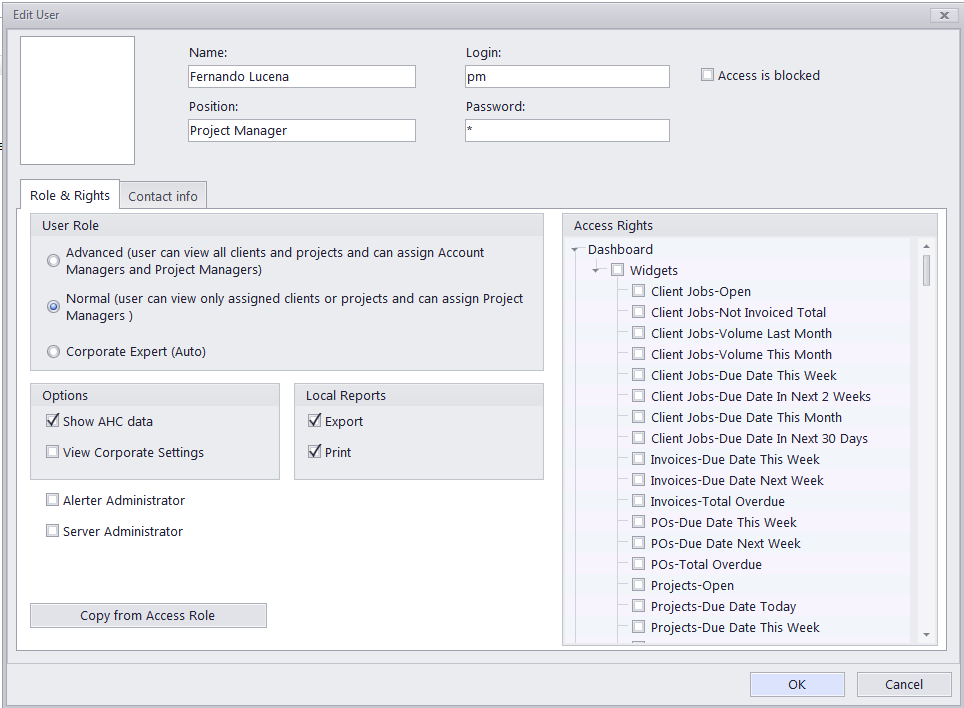
Photo — an image file with a Max resolution of 70x70 pixels. Click the frame to either Load a photo from a file or click Assign from The Camera to take a picture with a camera connected to the machine. The following formats can be used: .JPG, .JPEG, .BMP (bitmap), .GIF (Graphics Interchange Format).
The Name field is used to enter the actual full name of the user. This name will be used in Projetex to refer to this user. This is not a login name.
The Login field stores the user name used to log in to Projetex.
The Password field stores this user's password. Passwords are case-sensitive.
The Position field contains the description of the user's position. Usually this is the name of the Access role preset. The position field does not affect any actual access rights.
The Access is blocked check box can be used to disable this user's account.
Role & Rights tab
You can quickly assign pre-defined access rights to this user by clicking the Copy from Access Role button. This will copy settings from one of the access roles you have previously defined in the Access Roles tab.
Each user can have one of three general access levels:
Advanced is the highest access level possible. Users with advanced access can view all clients and projects in the database. These users can also assign account managers and project managers, as well as create client product lines.
Normal access level permits a user to view only assigned clients and projects. Thus, if a normal access level user is not a project manager of a project, or not an product line project manager of the client's product line, he or she cannot view this project. This access level is recommended for project managers.
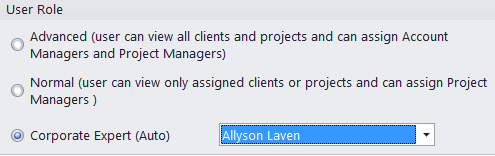
Corporate Expert (Auto). This access level is always associated with a particular expert profile, chosen via drop-down list. This user will have access only to that particular expert profile and the records and files associated with it. The user will also have access to the Team and Expert knowledgebases.
Show AHC data - select his check box to permit the current user access to the average hourly cost rates of in-house translators experts.
The Export and Print options in the Local Reports block - toggle these to determine the user's access to local export and print functions.
View Corporate Settings - check to enable access to Corporate Settings in the Backstage for the current user.
Alerter Administrator - if checked, the user can log into the Automation Engine.
Server Administrator - If checked, the user can log into the Server Administrator program and has access to the Administrator tab in the Workstation Backstage.
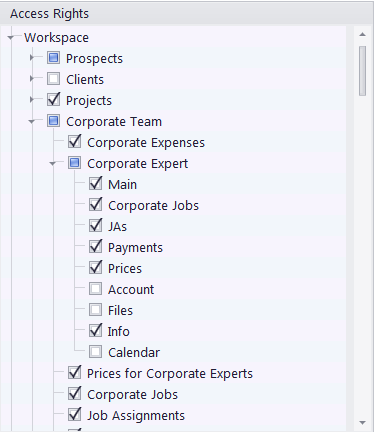
Access Rights
This area is used to configure the user's access to various Projetex windows and tabs.
Select or clear check boxes to hierarchically grant or deny access to:
Sections of the Navigation Bar,
Ribbon tabs within the sections,
Icons within the Ribbon tabs,
and tabs within the Client, Prospect, Project, Corporate Expert, Freelancer, and Applicant tables.
Contact Info tab
This tab stores the basic contact info for each user account and contains the following fields:
E-mail (up to 2) — maximum 250 characters.
Enable Mail Alert — enable this check box to allow the user to receive alerts from the Automation Engine to the first e-mail address.
Phone numbers (up to 4) — maximum 250 characters each.
The "Admin" Account
This is the default account that can not be deleted or disabled, has full access to all areas of Projetex and a reduced number of options.
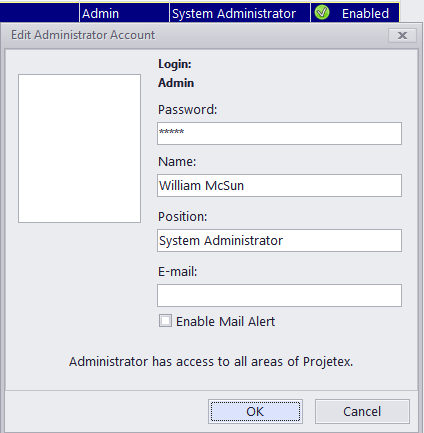
You can alter the account's photo, password, name, position designation, and add an e-mail with the option to send alerts to it.
![]()
See also: